
A recurrent request with SharePoint 2007 was how to assign metadata to documents or list items. In fact, apart from using lists of keywords as custom columns in content types, there was no out-of-the-box way to manage taxonomy at the enterprise level. Therefore, the keywords list had to be duplicated and even worse, synchronized to assure the consistence of the taxonomy. Moreover, there was no way to send Content Types across site collections.
With SharePoint 2010 comes the Managed Metadata Service Application that you can connect to your web application. Thus, it offers a central mean to manage your enterprise keywords and their hierarchy (taxonomy). Also note that the same service can be used to push or publish a content type to other site collection or even other farm, which is a great feature, but that will not be described in this blog post.
This first article about Managed Metadata Service will lead you through the steps to manage your enterprise taxonomy.
But, before we start, some glossary :
- Term store : the location where the taxonomy resides or are stored. There is only one term store per Managed Metadata Service.
- Term group : a group containing common purpose term sets. It is also a security container, meaning that, like site collections, you can set the permissions at that level.
- Term set : a taxonomy
- Term : a keyword
- Tag : in opposition to a term that is taken from a closed list of keywords, a tag can be freely defined by any user.
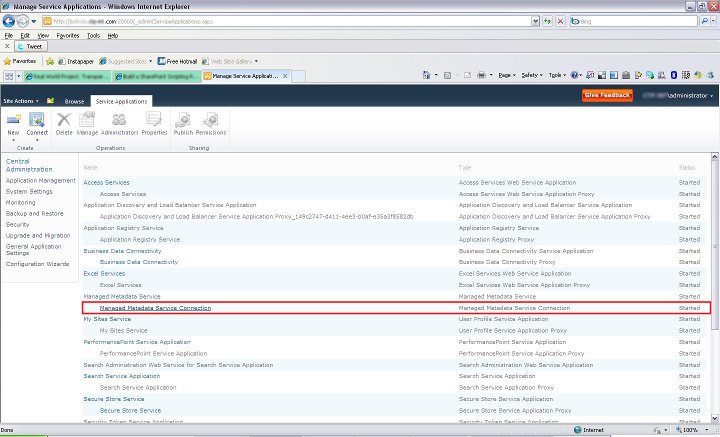
Now, start by defining our taxonomy. In the Central Administration (CA), under the Application Management section, go into Manage Service Applications. Click on the Managed Metadata Service proxy representing a connection or an instance of your Managed Metadata Service to open the term store.
On the left pane, the term store is displayed and it is under the name of your connection (or proxy) that you will create the term group. The Search box allows searching a specific term in case you don’t remember where or in which taxonomy a term is filed.
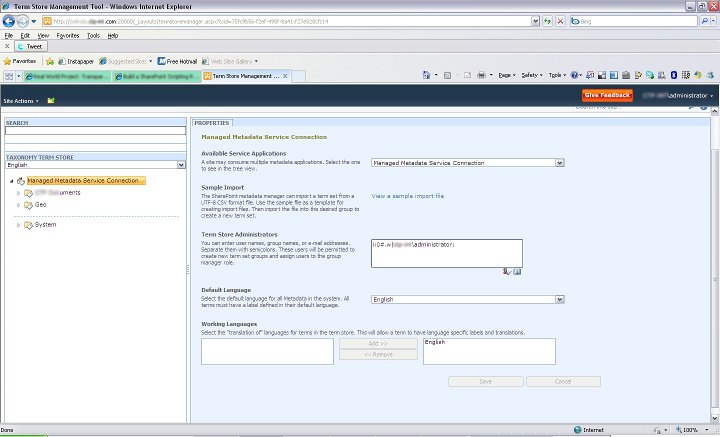
In the right pane, it is possible to select the Managed Metadata Service connection you want to modify. You can also delegate the administration of the term store to others by declaring them in the Term Store Administrators box. If you have installed language packs on the server, you have the possibility to define which of the language the default one is. Just below the Default Language drop-down, you can select in which languages the Term Store will be available, knowing that if a term is not translated, the default language will be used.
On the Term Store in the left pane, click on New Group and name it Geo. At that level, it is possible to delegate the management of the group to other people that will be responsible for managing the contributors and the group itself. A contributor is therefore able to add, change or remove terms in a group. Of course, that newly created group can be deleted by clicking on Delete Group.
At this level, there are two choices. The first one is to import the taxonomy directly from a comma delimited file. Thus, when you click on the term store, the right pane has a section named Sample Import in which a link to a sample is provided. Opening that file, you will see that the format is really not difficult to understand and that there is no need to go in the SDK or on the web to discover and understand an obscure format. Indeed, at each line of the file the complete hierarchy of the term is described. So, when you click on a Term Group, you can import such file. If for reason or another, the same term appear at the same level of the taxonomy, a warning will be displayed, but the file will be imported anyway, importing only once that term.
The second choice to define the taxonomy is the one that is described now. Here, there is probably a question that is popping-up in your mind. How to export a taxonomy ? At the time of writing this post, the feature is not present in the UI and will probably not be implemented in the final release as well. For this, there is no other choice than using the API to get the terms from the store. This will be described in another post.
On the newly created term group, click New Term Set and name it Political. Groups or users can be set as term set administrators. An important setting is the Submission Policy that tells if users can add terms when tagging items or documents. In other words, if terms can automatically be added if a user types a keyword not present in the taxonomy.
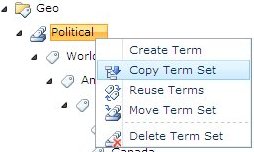
On the Term Set, the following actions can be done :
- Create Term : To create terms or term nodes. This will be used to create the whole hierarchy of the taxonomy.
- Copy Term Set : Copying a term set will create a new term set with terms that will be reused, keeping the original terms in the source term set.
- Reuse Terms : Allows to take another term (or term node) to reuse in the selected term set. Typically, reusing a term is used when a keyword can describe something that can be part of more than one hierarchy. For example, in a industrial company, an engine can be a product, but can also be a project. It means that it will be present in both product and project metadata hierarchy.
- Move Term Set : Moves the term set from a term group to another one.
- Delete Term Set : Self-explanatory, this will delete the entire Term Set.
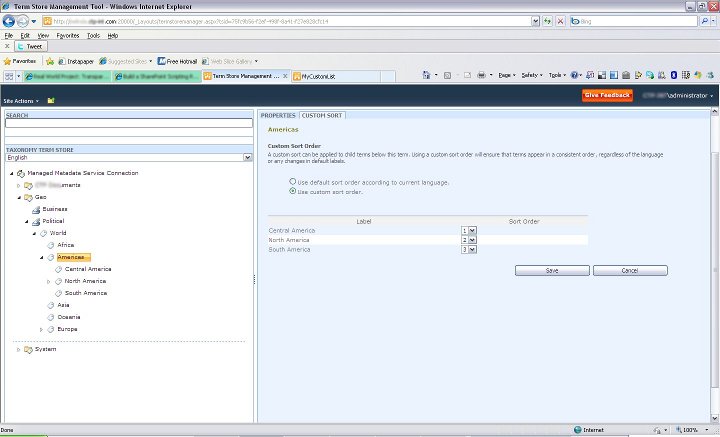
In the right pane, you can see that another tab is present, named Custom Sort. By default, the terms will be sorted as they have been entered or as they appear in the tree. The problem is that sometimes, you prefer to change the order to promote some terms. Clicking on Custom Sort will propose two choices, the default one being the Use default sort order according to current language. The second option, Use custom sort order allows you define yourself the order in which the terms should appear.
From here, the goal is to enter several terms.
To make a term available for tagging items or document, the Available for Tagging must be checked. When language packs have been installed, it is possible to select the language you want to edit. In Other Labels, it is possible to add one synonym per line that will be associated to the term. It means a user can select a synonym in the list that will automatically translated into the base term. At the bottom of the right pane, the list of term store where the term is available is listed.
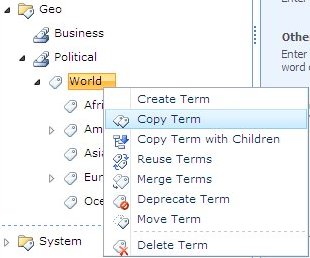
On a term, the following actions can be done :
- Create Term : Same as for a term set, creates a new term
- Copy Term : Creates a copy of the term and, contrary to the same term set action, this will not reuse the term, but really will copy it.
- Reuse Term : Allows to select a source term to reuse under the selected term.
- Merge Terms : Once a term is selected it merges it with the target term selected in the pop-up window. In other words, the term selected will be a synonym of the target term.
- Deprecate Term : Makes the term no-longer available when tagging an item or a document. It is still there in the store, but, from a user point of view, it is like if it was deleted.
- Move Term : Moves a term into another term
- Delete Term : Completely deletes a term from the store
- Copy Term with Children : Available only on node terms and creates a complete copy of the term with all the children and their hierarchy.
This closes this first blog post on the Managed Metadata Service. The next one will focus on how to use the taxonomy we defined in a web application or a site collection. But, before closing this blog post, there is another question that we should ask. How to use external data as metadata ? Currently, nothing is done for this, but we can guess that ISVs will make tools and connectors to allow this functionality in SharePoint 2010.
0 Comments